- Unpack your Tracker IPm controller and mount it securely using the mounting feet found in the enclosure.
- Wire power to the AC-DC power supply (wiring diagrams). Typically 120/240 VAC selectable single phase is supplied. If you ordered a power supply for a different Voltage or perhaps 3 phase, check the wiring diagrams. For information about choosing a power supply look here. In all cases it is important that the L (HOT) wire is wired through the fused shut off switch.
- Connect the motor cables which are marked for AZ Azimuth and AL Altitude to the appropriate motors. Wiring diagrams for reference.
- By default the tracker is shipped with the current Azimuth position of 180 degrees and Zenith position of 45 degrees. This should allow testing of the Manual Switches.
- Place the Auto-Manual switch in Manual. The UP-DOWN & EAST-WEST switches should be in the middle position.
- Test the UP-DOWN switch in each direction for a few seconds and see that the motor moves in the correct direction. If it doesn’t see this procedure.
- Return to the middle position.
- Test the EAST-WEST switch in each direction for a few seconds and see that the motor moves in the correct direction. If it doesn’t see this procedure.
- Return to the middle position.
- Now you are ready to calibrate your tracker.
Calibrate using Serial cable and Sixnet Toolkit.
- Make sure you have installed Sixnet Toolkit. Instructions
- Connect the unit to the computer via serial connection. Instructions
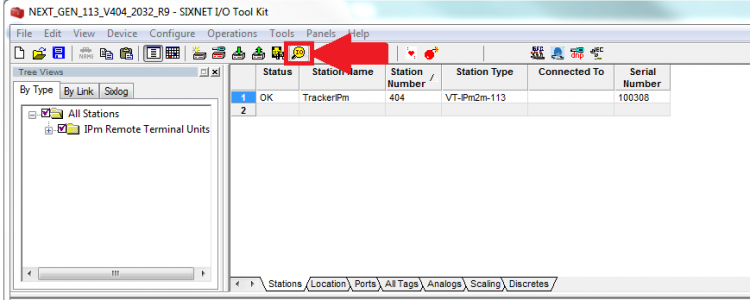
- With Sixnet Toolkit open and the device fully connected click the device status (should say “Ok”) to highlight it. Then press the I/O graphic in the menu (shown below). This needs to be accessed to complete the following proceedures (4,5 and 6).
- Set the Operating Parameters. Instructions
- Set Location Parameters. Instructions
- Complete Motor Configuration. Instructions
- Go through the following to calibrate. Instruction
Calibrate using IPWebcontrol
Use the following tutorial to calibrate using the IPWebcontrol website. Tutorial
Accessory Installation
See the following pages for information on installing accessories (if necessary).